Are you attempting to preview your app using Android Studio and find yourself hung up on which is the easiest way to get that mobile preview or emulator working? Fear not-you’re in a good place! Getting a mobile preview or emulator going in Android Studio isn’t all that tough once you see how.
In this post, I will guide you step by step on how to activate the mobile preview/emulator so you can start testing your app in no time. Let’s get started.
Why is the mobile preview/emulator important?
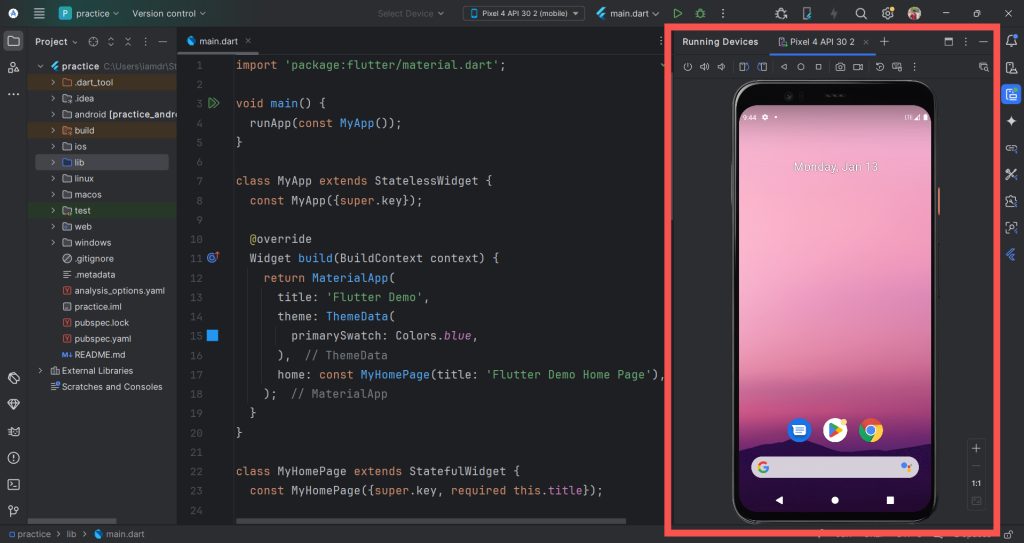
The mobile preview or emulator in Android Studio allows you to run your app in a virtual environment, simulating the experience on a real device. It’s a very important tool for testing your app, identifying bugs, seeing outputs and ensuring the user experience is seamless across various devices and screen sizes.
However, if it is not configured properly, you might experience errors such as the emulator not starting or not appearing. These problems often occur for three common reasons:
1. Missing System Image or Emulator Configuration
If the system image or emulator settings required are missing, the Android emulator cannot be launched.
Example: You try to launch the emulator, but the system shows a message like “No system images installed.”
2. Outdated or Missing SDK Tools
The emulator requires specific tools, such as the Android Emulator and Platform Tools, which must be updated or installed.
Example: An outdated version of the emulator causes slow performance or crashes during startup.
3. Incorrect Device Settings or AVD Configuration
A poorly configured Android Virtual Device (AVD) might not match the app requirements or screen size, causing rendering issues.
Example: You select an AVD with low RAM, which results in the emulator failing to boot.
Now that you know the possible causes, let’s get to the solution.
ㅤㅤ
ㅤㅤ
Follow these steps carefully to set up and enable the mobile preview/emulator.
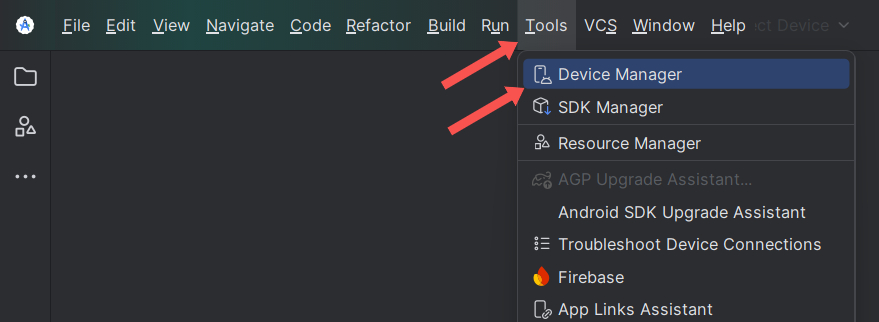
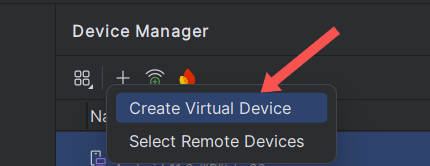
Step 1: Open the AVD Manager in Android Studio. Go to the top menu bar, Tools > Device Manager (previously known as AVD Manager). In the AVD Manager, click the Create Virtual Device button if you don’t already have a configured device.
ㅤㅤ
ㅤㅤ
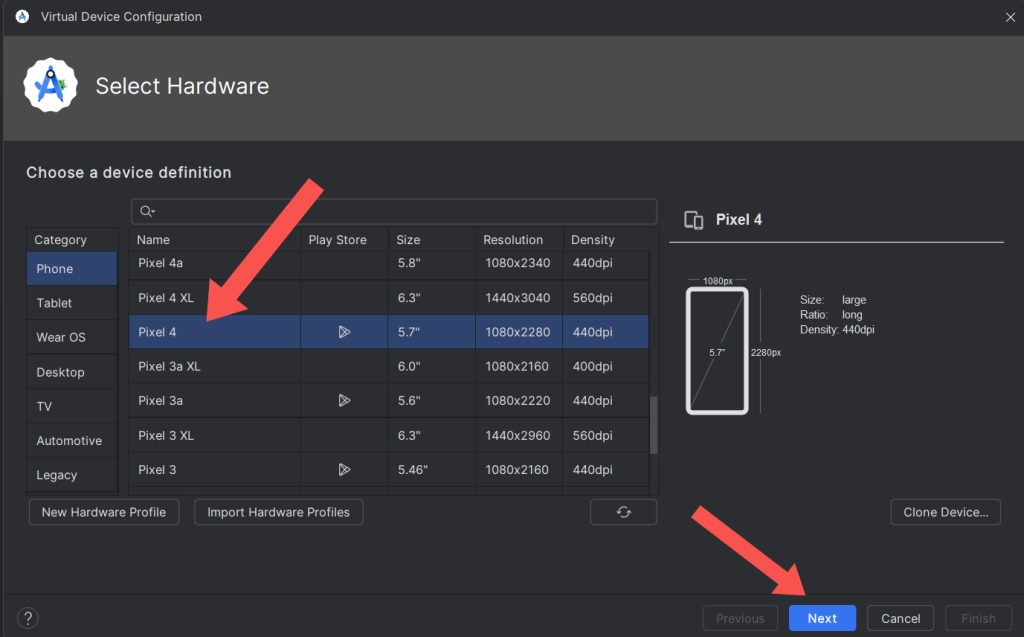
Step 2: Select a Hardware Profile. In the “Select Hardware” dialog box, choose a device profile that matches the type of device you want to emulate (e.g., Pixel 6, Nexus 5X, etc.). At last, click on Next.
ㅤㅤ
ㅤㅤ
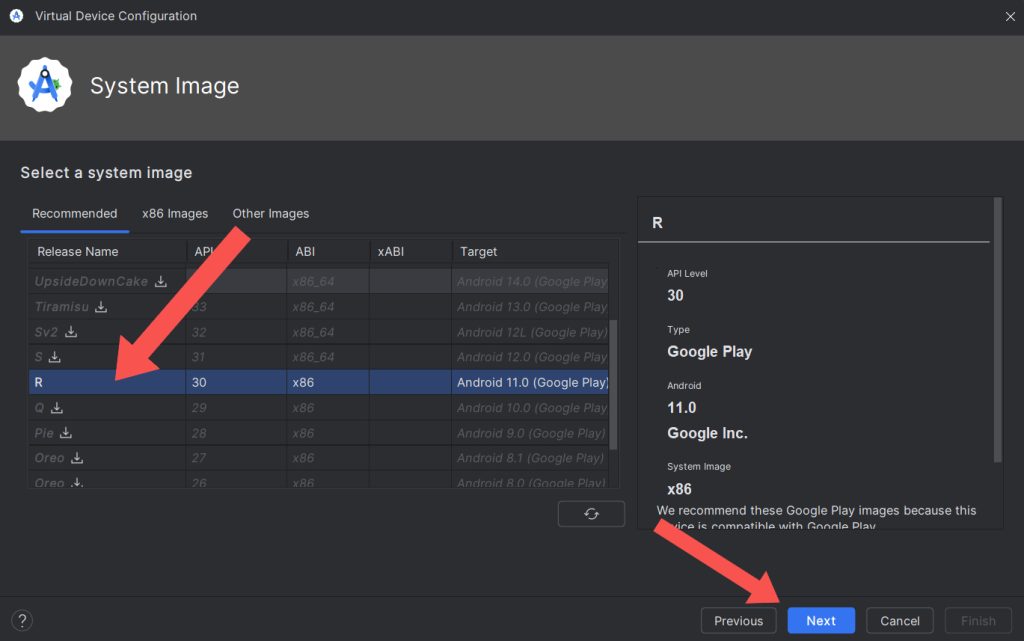
Step 3: Download and Install a System Image. On the System Image screen, choose the desired Android version (e.g., Android 13) and click the Download button if it’s not already installed. Wait for the download to complete, then click Next.
ㅤㅤ
ㅤㅤ
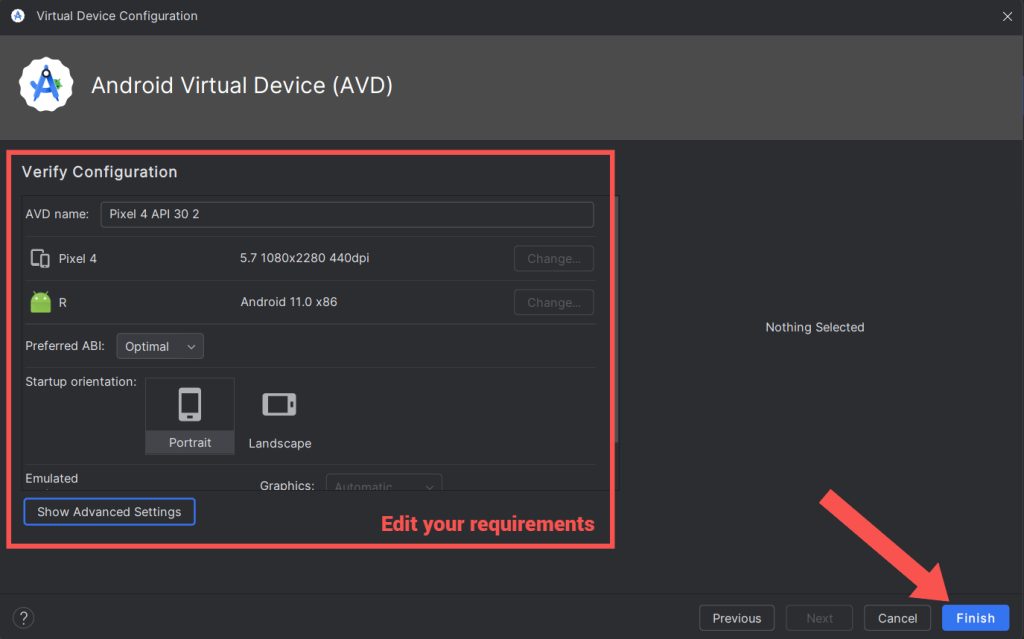
Step 4: Configure the Emulator Settings. In the AVD Configuration page, adjust the RAM, screen resolution, and other settings as needed. Enable the Graphics option (Hardware or Automatic). Give your virtual device a name, then click Finish.
ㅤㅤ
ㅤㅤ
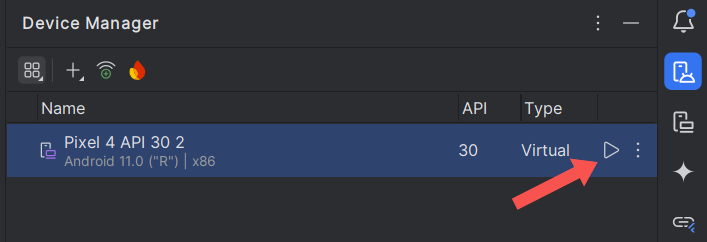
Step 5: Finally, Launch the Emulator and check it. First, return to the Device Manager screen. Click the Play(▶) button next to your virtual device to start the emulator.
ㅤㅤ
ㅤㅤ
By following these steps, you should have successfully enabled the mobile preview/emulator in Android Studio. Testing your app on an emulator is a critical step in the development process, and now you’re ready to debug and improve your app.
If you face any issues, double-check your AVD settings or refer to the official Android Studio documentation. Happy coding!