Want to host your website for free with a custom domain name, using HTTPS? Well, say thanks to GitHub Pages and Cloudflare for making this possible. Setting it up may seem complex, but with a step-by-step guide, it becomes incredibly straightforward. In this tutorial, I will guide you on how to host your website on GitHub and connect it to a custom domain using Cloudflare for added security and speed. Let’s dive in!
Why Use GitHub Pages and Cloudflare?
GitHub Pages is a free platform for hosting static websites directly from your GitHub repository (folder). However, using a custom domain ensures your website looks professional. Cloudflare adds a layer of benefits like free SSL certificates, faster performance through caching, optimisation, anyalising and enhanced security.
What You’ll Need
- A GitHub account.
- A registered domain name (from providers like Namecheap, GoDaddy, etc. – you can use any domain provider for this).
- A Cloudflare account (free tier is enough).
ㅤㅤ
How to Host a Website on GitHub with a Custom Domain Using Cloudflare
Follow these steps carefully to host your website and integrate it with Cloudflare.
Step 1: Host Your Website on GitHub Pages
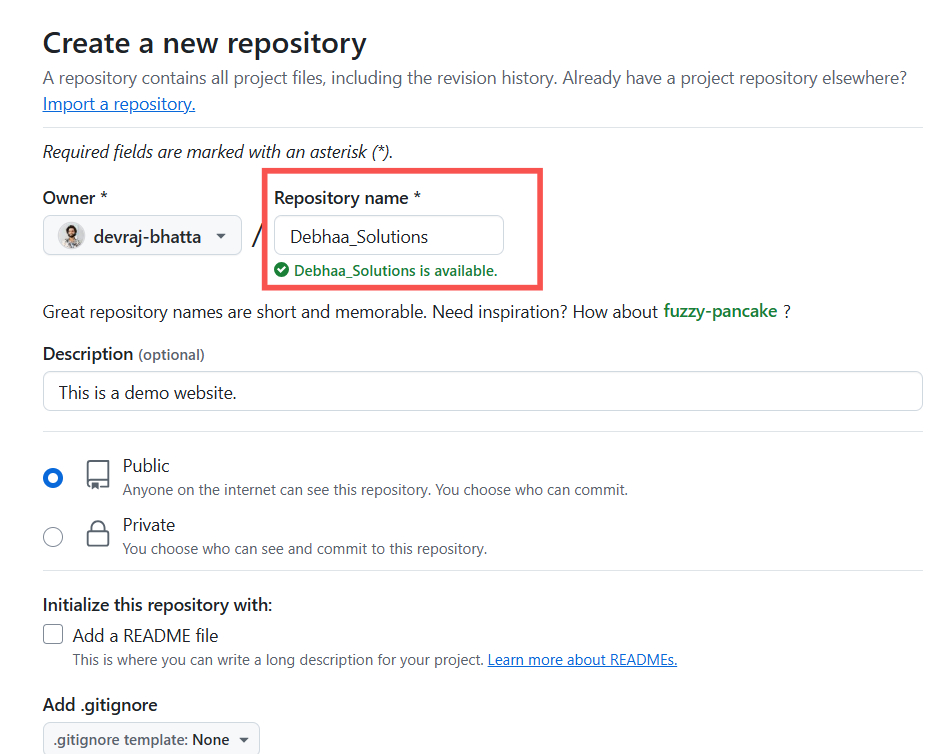
- Create a Repository
- Go to your GitHub account and create a new repository.
- Name it
<username>.github.io(replace<username>with your GitHub username).
ㅤㅤ
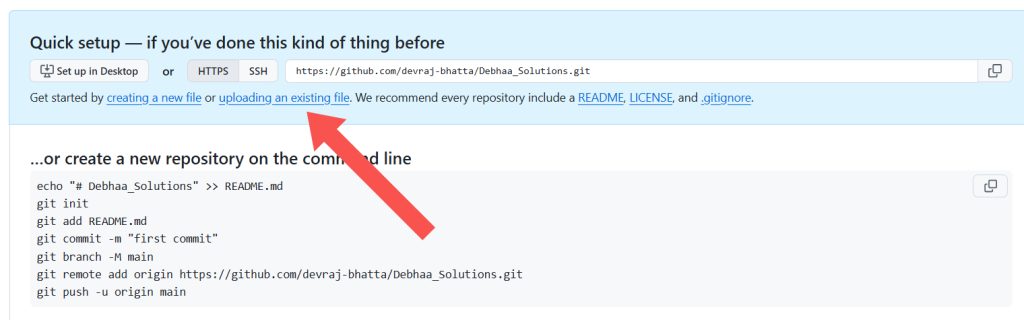
- Add Your Website Files
- Upload your static website files (HTML, CSS, JS) to the repository.
- Commit the changes.
ㅤㅤ
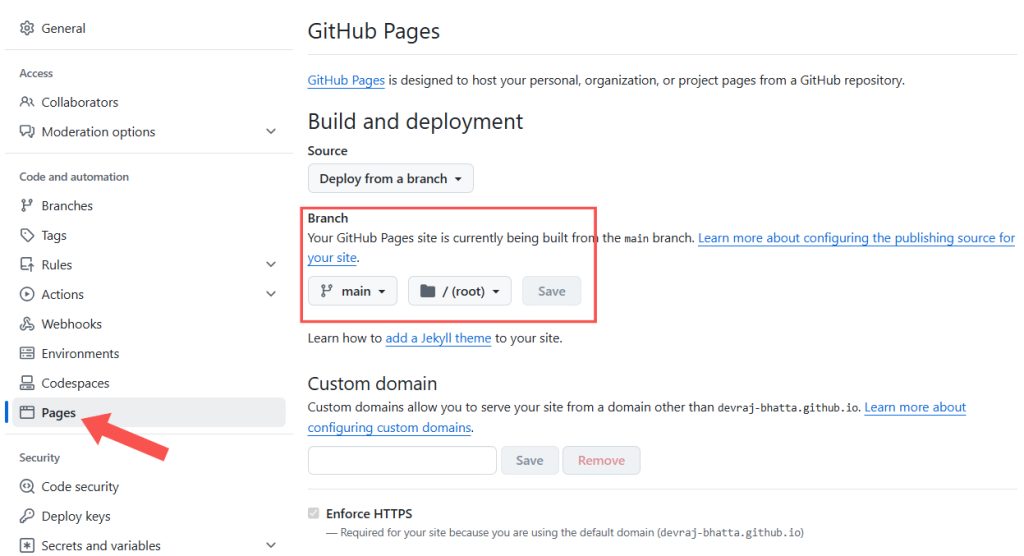
- Enable GitHub Pages
- Navigate to the repository’s Settings.
- Scroll down to Pages and select the branch where your files are located (e.g.,
main). - GitHub will generate a URL for your site (e.g.,
https://<username>.github.io).
ㅤㅤ
ㅤㅤ
Step 2: Set Up Your Custom Domain in GitHub
- Add Your Custom Domain
- In the GitHub Pages Settings, find the Custom Domain field.
- Enter your custom domain name (e.g.,
www.example.com) and save it.
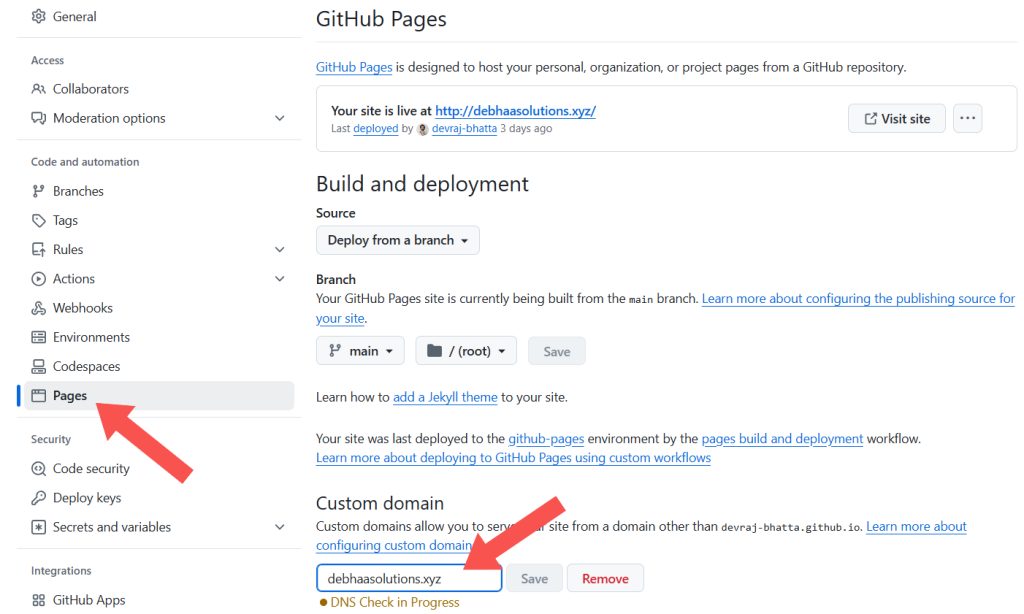
- Verify DNS Records
- GitHub will display the DNS records (CNAME or A records) you need to set up.
- Copy these records—you’ll use them in Cloudflare later.

ㅤㅤ
ㅤㅤ
Step 3: Configure Your Domain in Cloudflare
- Add Your Domain to Cloudflare
- Log in to your Cloudflare account and click Add a Site.
- Enter your domain name and click Begin Scan.
- Cloudflare will scan your current DNS records—verify and continue.

- Set Cloudflare’s Nameservers
- Cloudflare will provide two nameservers (e.g.,
ns1.cloudflare.comandns2.cloudflare.com). - Log in to your domain registrar (e.g., Namecheap, GoDaddy) and replace the existing nameservers with Cloudflare’s.
- Cloudflare will provide two nameservers (e.g.,
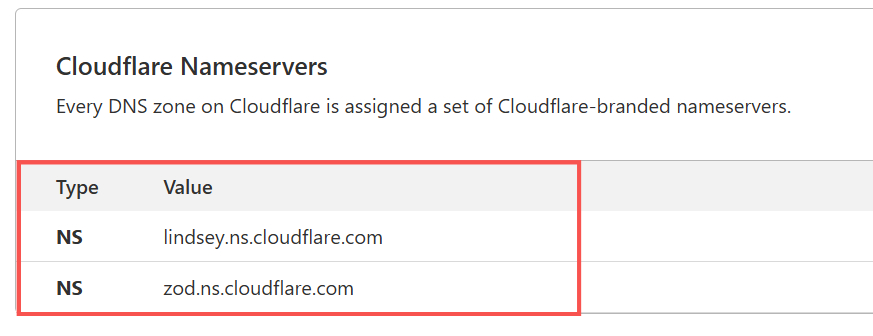
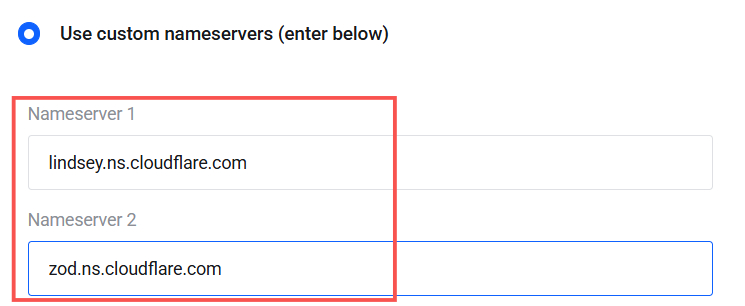
NOTE: Copy the exact nameserver 1 and 2 provided by Cloudflare to your domain nameserver, from your domain provider site.
ㅤㅤㅤㅤ
ㅤㅤ
Step 4: Add GitHub Pages DNS Records in Cloudflare
- Go to the DNS Settings
- In Cloudflare, navigate to DNS > Records.
- Add the GitHub Pages DNS Records
- Add the CNAME record (if GitHub provided one):
- Type: CNAME
- Name:
www - Target:
<username>.github.io
- Add A records (if GitHub provided them):
- Type: A
- Name:
@ - Value: The IP address(es) provided by GitHub.
- Add the CNAME record (if GitHub provided one):
- Enable Proxy (Orange Cloud)
- Ensure the orange cloud icon is enabled for all the records to route traffic through Cloudflare.
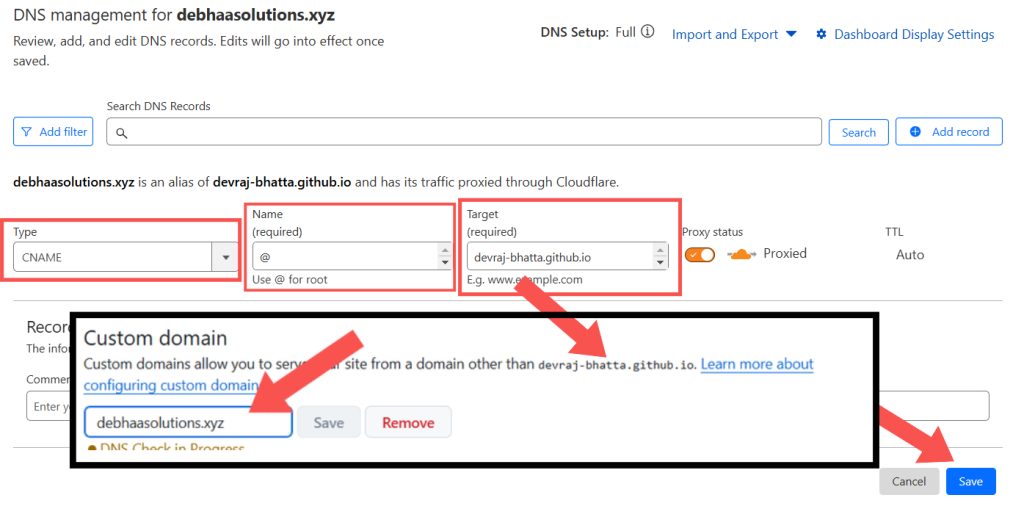
NOTE: Write the exact same target in cloudflare as github provided while adding your custom domain.
ㅤㅤ
ㅤㅤ
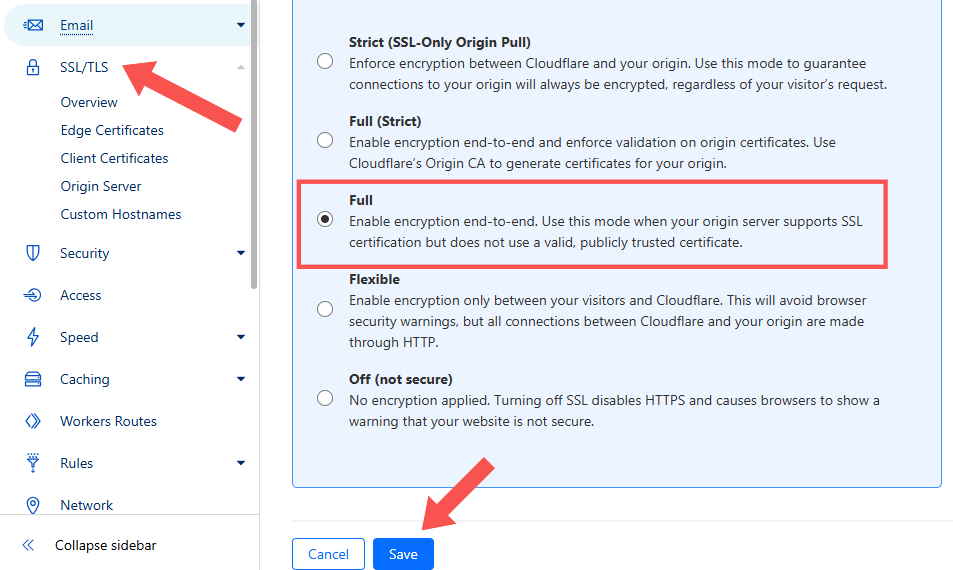
Step 5: Enable SSL/TLS in Cloudflare
- Go to the SSL/TLS settings in Cloudflare.
- Select Full (Strict) to ensure secure HTTPS communication.
- Cloudflare will automatically issue an SSL certificate for your custom domain.
ㅤㅤ
ㅤㅤ
Congratulations! Finally, your website has successfully been hosted on the internet with free SSL (https://) using GitHub Pages and connected it to a custom domain linking with Cloudflare. You’ve created a robust, professional, and secure website setup by combining GitHub’s free hosting with Cloudflare’s security and speedsetup. If you face any issues, double-check your DNS settings and refer to Cloudflare or GitHub documentation. Enjoy your new website!